It made quite a splash recently so I’m sure some of you are curious about Amazon’s new Content Delivery Network (CDN) service, CloudFront. I know the Amazon Web Services suite of tools can be a little intimidating for non-developers, so this article outline how pretty much any reasonably technical person can get themselves up and running on CloudFront and can start reaping the benefits of geographical optimized content delivery.
This article assumes you already have both an S3 account and a CloudFront account (or at least know how to set each up.)
The Basics
The basic process works like this:
- Place an object (IMG, FLV, etc) in an S3 bucket and ensure that it’s publicly readable
- Create a CloudFront “distribution” based on that bucket. CloudFront will auto-generate a *.cloudfront.net domain name for you to use to reference your object
- Link to your object using the domain name an appropriate path (e.g. http://random1234.cloudfront.net/path/to/your/object.jpg)
- When a user requests the object and Amazon CloudFront chooses the appropriate location from which to serve your object
- Speed ensues
Bucket Explorer
Bucket Explorer is the preferred solution around these parts. It’s fast, easy to use and offers custom headers (which allows performance geeks like myself to set far future expires headers.) It also has a beta version with built-in support for CloudFront.
The only drawback is that it’s a commercial product. Actually, for me, that’s not a drawback as I’m happy to pay for good software. I know some people are less apt to use a commercial package for something like this, so I mention it.
That said, this is definitely the best solution, so at the very least set yourself up with a trial version and give it a go.
How to Set Up CloudFront With Bucket Explorer
- Click
Bucket : Create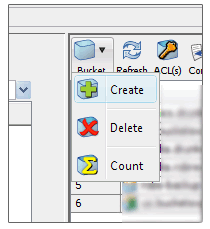
- Name your bucket. If you plan on using your bucket as with a CNAME, then you must name the bucket exactly as the CNAME record (e.g.,
media.example.com)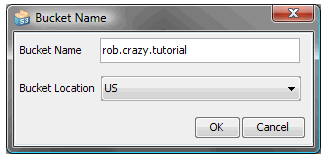
- Make it public (people have to be able to access it) by setting the All Users checkbox
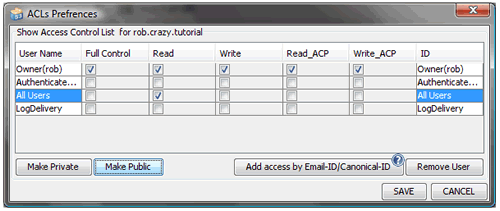
- Upload your files. If needed, follow the instructions here for uploading files with far futures expires headers.
- Make a distribution by clicking on the
distributionbutton
That opens up your distribution list.
- Once there click
new.
- Select your recently created bucket
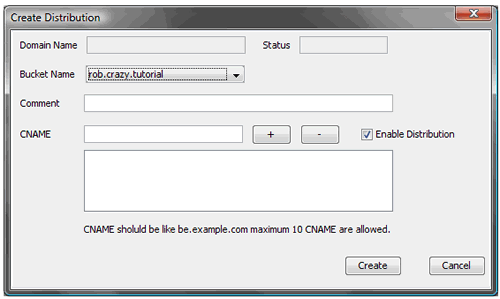
- Click
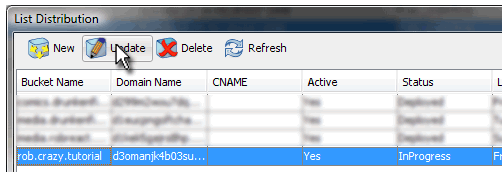
Create, Bucket Explorer will go about it’s business, creating your distribution. This might take a few minutes.You’ll see it in the list as “InProgress.”
-
Even if it’s InProgress, selecting it and clicking update will allow you to complete the final step, which is getting the CloudFront URL you’ll need to access your files. Simply select the domain name and use your system’s copy command to get the domain into you clipboard.
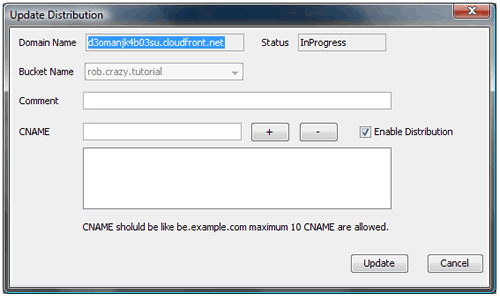
- Now, all you have to do is reference the newly created domain name and the needed file path to access your assets.
S3 Firefox Organizer
S3 Firefox Organizer is a free, Firefox add-on that allows you to manage S3 buckets and files from the comfort of a Firefox tab. Very easy to use and priced right (although I encourage donations if you find it useful,) the only thing holding back S3 Firefox Organizer from being my main S3 tool is the lack of a few advanced features (far futures expires headers being a big one.) One advanced feature that they do have is the ability to manage CloudFront distributions.
- In your remote window, right click and select
Create Directoryor click on theCreate Directorybutton.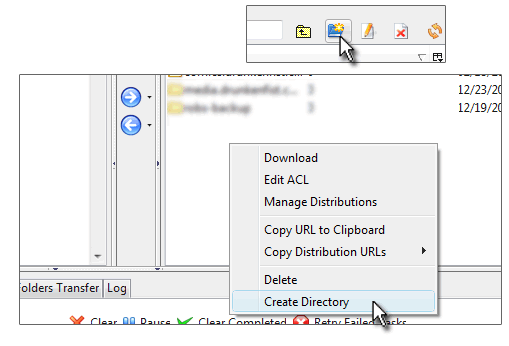
- Give it a name. Once again remember to match the bucket name to the name of the domain if you’re planning on using a CNAME with this bucket.
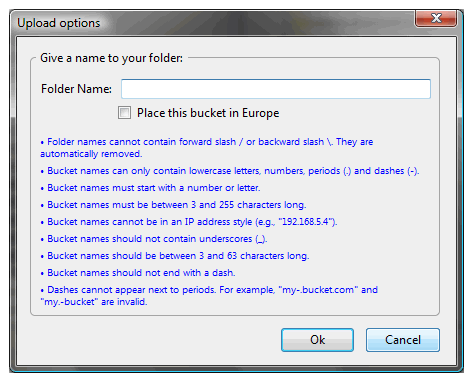
- Right click on your newly created bucket and select
Manage Distributions
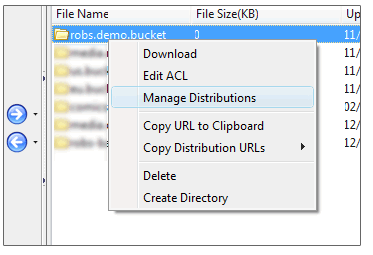
- This will bring up the distributions dialog. click
Create Distribution:
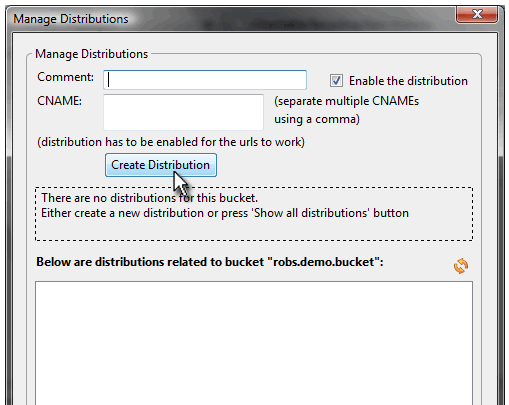
- It’ll create the distribution. Refresh the list below and you’ll be able to select your newly created distribution. Click
Copyto get the URL onto your clipboard and you’re ready to start using your new distribution.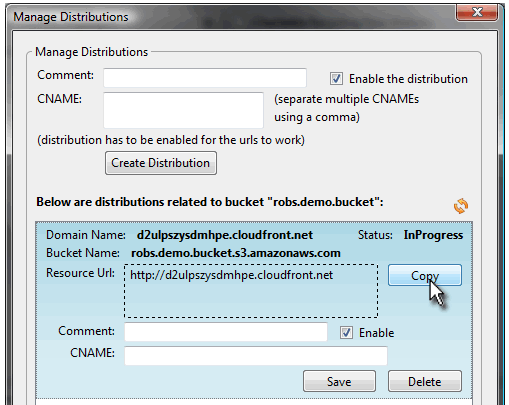
And there you have it, two easy ways to get up and running with Amazon CloudFront. If you run into any problems leave a comment and I’ll try to clear up any issues you might have. I can’t guarantee anything (including that the above tutorial won’t turn your site into a smoking wreck 🙂 ), but I’m always keen to help.
The next version of S3Fox will include support for custom headers (I emailed the author and he pointed me to the super-secret-not-yet-ready-for-production 0.4.6 installer).
That’s great news. I love having the browser based option.